| POST PRODUCTION: SHARPENING DIGITAL IMAGES |
 |
|
Sharpening is an essential part of the post-processing workflow. Sharpening allows you
to make up for detail lost in the image capture process, as well as accentuate the detail hidden
in the image. It's important to know about image sharpening so that you can achieve the right
level of detail and optimize your image for printing or web use.
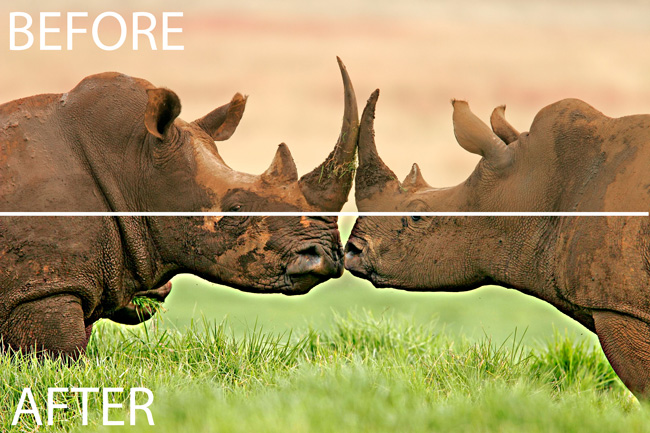
Comparison of before and after image sharpening. Image sharpening helps to bring out image details and adds texture to the images.
|
SUMMARY
| PHOTO EDITING SOFTWARE |
ASPECTS OF IMAGE SHARPENING |
THREE-POINT SHARPENING |
|
Editing software can enhance and elevate your images by adding a professional touch to your work. In this section we will explore few photo editing software in the market.
|
Sharpening tool in most image-editing programs has three components: radius, amount and threshold.
|
Three-point sharpening based on capture, creative, and output. |
|
| PHOTO EDITING SOFTWARE |
|
|
There are numerous professional photo editing software in the market. Editing software can enhance and elevate your images by adding a professional touch to your work. Understanding key editing features and functionalities can help you find an optimal style for your images, and define your personality as a photographer. For novices, start with free or low cost editing software, and work your way. Typically the features are easy to learn and use. As the cost increases, more flexibility, features, and advanced editing techniques. However, the process of image sharpening is consistent in various editing softwares. Few Photo Editing Software in the market are Adobe Photoshop, Adobe Photoshop Element (Consumer version of Adobe Photoshop), Adobe Lightroom, Skylum Luminar, Capture One, Inkscape available for free etc. For the purpose of this article, we will look specifically into sharpening your digital images on Adobe's Photoshop Element.
|
| ASPECTS OF IMAGE SHARPENING |
|
|
The sharpening tool in most image-editing programs has three components: radius, amount
and threshold. Digital sharpening, in its simplest terms, applies contrast to the edges in an
Image.
Adobe Photoshop Elements→Enhance→Adjust Sharpness→
Amount: A value, usually from 1 to 100, determining how much of the contrast effect to apply. A value in the low to mid range is usually best, as images are susceptible to oversharpening.
Radius: Controls the size and blur of the "edges" in your photo. A higher value will increase these qualities, while a lower value will make the "edges" more refined.
Threshold: Most sharpening tools use areas of high contrast or dramatic brightness change in the image to determine where to apply sharpening. Threshold establishes the minimum brightness change at which a sharpening effect will be applied.
|
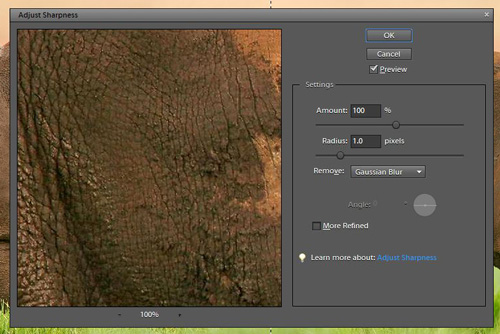
Amount, radius, and threshold on Adobe Photoshop Element.
|
| THREE-POINT SHARPENING |
|
|
Capture Sharpening: No matter how advanced the sensor in a digital camera is, some detail will always be lost. Most modern digital cameras create images with some detectable "softness" or "haze" to them. This is simply a result of the built-in sensors used to take the photo. Many image editing programs have an option to configure the capture sharpening settings in order to account for the "softness" cause by your specific camera model and lens, and even apply it automatically to any photos that may be imported into the program's library. This method of sharpening will provide a nice "base" layer of sharpening to the entire image, but more selective sharpening may be needed to optimize the image's detail. Additionally, it is best to avoid over utilizing capture sharpening as is may add unwanted levels of detail and noise to certain areas of the photo.
Creative Sharpening: Sometimes called local sharpening, this point of sharpening is applied to specific areas, usually in the form of a brush tool. Which parts of an image receive specific sharpening depends on the type of image and the photographer's creative intent. For example, a landscape photographer will not care about applying sharpening to a smooth, blue sky. However, the mountains in the distance may benefit from some local sharpening to help them stand out. A portrait photographer may want to apply specific sharpening to a subject's eyes, but not the background behind them.
Output Sharpening: This stage of sharpening is meant to optimize your image, either for web use or for print. When exporting an image for web or print use, some detail may be lost. In web photos, this can be caused by the compression process used to shrink images for websites. In print photos, it most commonly happens due to the material that an image is printed on, such as canvas or matte paper. Most digital editing programs have built-in options when finalizing an image for web use or print. These options will apply additional sharpening in order to compensate for any detail that maybe lost due to the printing medium or photo compression.
|
| CONCLUSION |
|
|
Sharpening, and its various tools and components, can seem daunting and confusing at first glance. In order to find what's best for you, try out the techniques listed in this article. Depending on your area of work, three-point sharpening may be immensely helpful in achieving the perfect level of detail and texture.
RESULTS
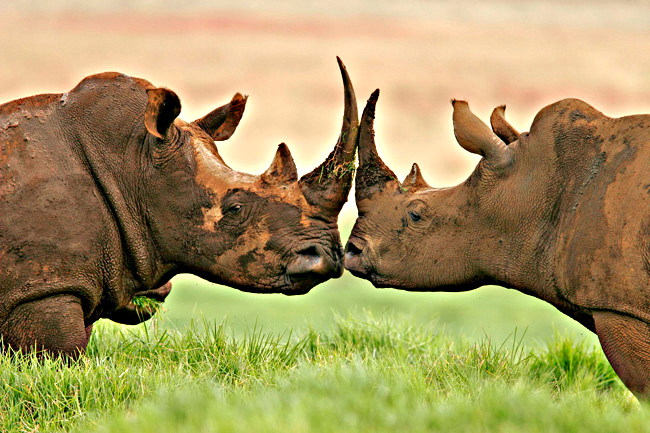
Before image sharpening: less detail.
|
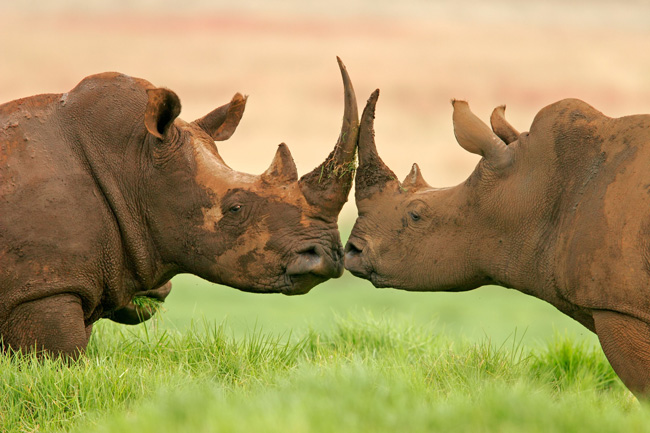
After image sharpening: more details and texture.
|
For more information check out Photography Related Resources.
|
|
If you have questions about any of our services or products, don't hesitate to contact us. Our knowledgeable staff is always happy to assist with answers, advice, or suggestions.
|
|
© 2002-2024 - KeenART Media Ltd.
|
|
| |
|