| HOW IT'S MADE: GICLÉE CANVAS PRINTS |
 |
|
When a Giclée canvas print is ordered, the client sees a beautiful finished piece, ready to hang. The technicians who create it, however, see the many aspects: a digital file to be perfected, a printer to care for, a frame to build, a canvas to stretch, and finishing to be completed for a superior, professional product that the customer will be proud to display for generations.
This article explains the many steps involved in the process to take an artwork from our client's computer to their living room wall.
|
SUMMARY
| MATERIALS |
FRAME CONSTRUCTION |
POST-PRINTING |
SHIPPING |
- Matte digital canvas
- CMYK pigment inks
- Epson Stylus Pro printer
|
- Mitre blade cutter
- Joining with underpinner machine
|
- ClearShield Canvas Guard coating
- Stretched and stapled on wooden frame
|
- Custom boxes, always
- Carefully packaged for safety
|
|
| MATERIALS AND PRINTING
|
|
THE CANVAS
There are three types of digital canvas on the market: 100% Cotton, Cotton-Polyester, and 100% Polyester.
At KeenART Media, we use a poly-cotton blend canvas. Since artist canvas is often made of cotton, this material combines the sought-after texture of a cotton weave with a color consistency that only polyester can offer. This 60/40 poly-cotton combination ensures from print to print - and roll to roll - the printed images will be consistently identical. This is a quality desired by most artists or retailers who require that every copy of an image be an exact replica of the original.
Digital canvas requires an ink-receptive coating, which allows the pigment inks to adhere to the canvas. This is applied at the manufacturer, prior to rolling and shipping the material. Matte, Satin (semi-matte), and Gloss finishes are available for this coating. We use LexJet matte canvas.
Most canvas rolls come in widths of 40 or 64 inches. This means the maximum width for a canvas print is about 60 inches if it is being stretched on a frame. This allows 5" for the excess, which is required to wrap around the sides of the frame. Prints that are not being stretched can be printed as wide as 63".
Because the rolls are around 40 feet long, there is no maximum limit to the print length.
THE INKS
The inks used for Giclée prints are called aqueous (water-based) pigment inks. These pigments come encased in cartridges, which are placed in the printer and attached to tubes. These tubes carry the ink from the cartridge to the nozzles on the print head, which move back and forth on a track, spraying ink in microscopic drops. In one square inch of a print, there can be as many as 2880x1440 or 4,150,080 little dots. This DPI - dots per inch - is the "resolution" of the image, and is directly related the PPI - pixels per inch - which refers to the same dots, in the digital image.
Our Epson Stylus Pro 11880 printer holds nine cartridges of UltraChrome K3 inks. These include the primary Cyan, Magenta, Yellow, and Photo Black (CMYK), as well as five additional tones of these colors: Matte black, Light black (grey), Light light black (light grey), Light cyan, and Light magenta.
The hundreds of thousands of colors that can be sprayed on the canvas as created by mixing very specific amounts, in different combinations, of these nine colors. There is no white ink - any white color on the image will simply be the blank canvas.
The inks we use have been tested to determine lightfastness, or how long the colors will stay true when exposed to moderate amounts of light. The tests have found color prints will last up to 200 years, while black and white prints will last even longer. This is assuming, of course, that the prints are properly displayed out of direct sunlight.
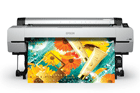
THE PRINTER
Our Epson printer creates a finely detailed image by spraying drops of ink with incredible precision. It takes an average of 6 minutes and 20 seconds to print a 20x30 inch image, though the time will vary depending on the resolution. The Stylus Pro can print images up to 2880 x 1440 DPI.
When in use, the printer needs to be kept between 50 and 95° F (10-35° C). This ensures the inks remain liquid enough, and flow at just the right speed for proper application. The canvas is fed through the printer from the roll. The printer can hold rolls up to 64 inches wide and is capable of printing edge to edge therefore, but generally space must be left to wrap the canvas around the wooden frame.
|

Blank digital canvas
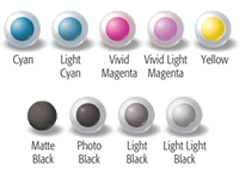
Epson UltraChrome K3 ink colors
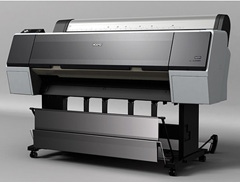
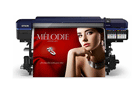
Epson Stylus Pro printer
|
| FRAME CONSTRUCTION
|
|
CUTTING
Most customers order their canvas stretched and gallery wrapped. This means once the image has printed and dried (see "coating" below), it will be mounted on a wooden frame. For each canvas, a custom frame must be cut and constructed.
At KeenART Media, we use a miter cutter to create the frame from lengths of wood, which allows the framer to cut on an angle - in this case a 45° angle - to create a miter joint, which is the most common picture frame corner style.
The length of wood is generally 8 to 12 feet long. Depending on the order, the wood may be 3/4" thick, or 1-3/8" thick. The length is slid under the cutter and the double blade is lowered using a foot pedal. The blade cuts the wood into two pieces, each with a 45° angle, and wastes only the small, triangular piece. A single length of wood can usually be cut into two or more frames (4 pieces each).
JOINING
Next, a machine called an Underpinner is used to join the corners of the frame together. First, a bit of glue is applied to the connecting edges of the frame arms. Then, the underpinner holds two arms of the frame together at a 90° angle. When the foot pedal is pressed, a pneumatic (air-powered) force drives a hammer down to hold the pieces in place, and drives wedge nails up into the bottom of the frame corner.
The machine can be set to administer a certain number of nails, depending on the size of the frame of the depth of the wood. 1-3/8" thick frames, for example, have two nails inserted one after the other in the same spot, so the first nail is driven further into the wood.
This step is repeated for all four corners of the frame, creating a sturdy wooden frame onto which the canvas can be stretched.
|
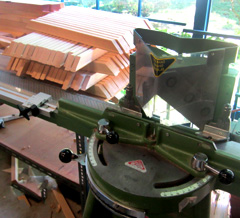
Miter Cutter
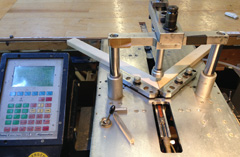
Underpinner and wood frame
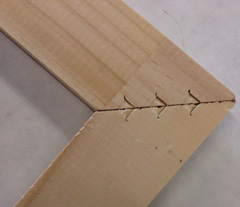
Wedge-nailed frame corner
|
| POST-PRINTING
|
|
COATING
Now we return to the canvas. Once the entire piece is printed (multiple prints will be arranged on the length of canvas, to create as little waste as possible), a special coating must be applied. Without this coating, the inks - which sit on top of the canvas - can be easily scratched off.
We use ClearShield Canvas Guard, a protective treatment that is sprayed onto the front of the canvas. We use a semi-gloss finish that gives a subtle sheen to the print, making the colors more vibrant. The canvas is hung in a special room that is well-ventilated and kept free of dust - while the canvas is drying, any particles in the air can easily attach to the surface.
The sprayed canvas takes a couple hours to dry, during which time the frame may be constructed. Once coated, the canvas has increased resistance to UV light (the "lightfastness" discussed above), and is safe from the general wear and tear that may befall it over the years.
At this point, if the customer has chosen not to have their canvas stretched, it will be neatly cut out, rolled up, and shipped to them in a tube. This is a common choice for very large canvases, where mounting them would risk their safety during delivery, and be quite costly.
STRETCHING
With the canvas dry and the stretcher bar frame built, it's time to stretch the canvas. The wood frame arms are shaped with a bump along one edge which keeps the canvas from pressing against the frame at any point except the very edge. This prevents "ghosting," which is a shadow or even a dent in the canvas created by it pressing against the bar.
- The canvas print is laid facedown on the framer's table. The stretcher bar frame is centered on top, "bump" side down. When centered, a little bit of the printed image should be visible when folded over on each side - this excess is printed to ensure no blank canvas is visible on the sides of the canvas. Once the frame is properly aligned, a few staples are applied in the center, using a pneumatic-powered staple gun.
- The piece is flipped around, and the same is done on the opposite side. Canvas pliers are used to pull the material as taut as possible - this is necessary so the canvas doesn't stretch and bow over time. The other two sides are affixed in this same manner.
- The corners of the canvas are cut away, so they can be neatly folded. A heat gun is used in each corner to soften the material and make it easier to achieve a sharp edge. Each corner is stapled in place.
- Finally, staples are placed all the way around, and any excess overlapping the stretcher bar is cut off.
FINISHING
The canvas print is nearly finished. The final finishing involves ensuring the back of the canvas looks just as presentable as the front.
Cloth tape - in black or white, depending on the image - is applied over the staples and rough canvas edges on the back of the frame. It is folded over the side of the frame for a smooth, even look. Bumpers - little adhesive squares of felt - are applied to each bottom corner, to prevent the canvas from scratching the wall.
If the canvas print is being framed, it would now be placed in the frame and the hanging hardware would be attached afterwards.
If the canvas is being displayed as is - frameless is the new modern style! - D-rings or hooks will be attached to the inside of each vertical frame arm, about 1/4 to 1/3 of the way from the top. Strong picture hanging wire is wound around each hook, with a bit of slack so the print can be easily hung on a wall hook.
|
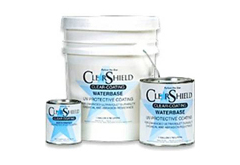
ClearShield Canvas Guard
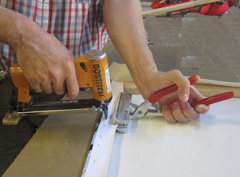
Stretching and stapling the canvas

A taped canvas with a sawtooth hanger
|
| SHIPPING
|
|
|
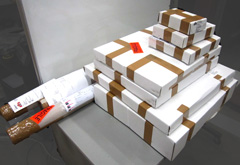
The finished print is carefully wrapped in foam sheeting to protect it from bumps during transit. A custom box is made for every canvas print, to ensure it fits perfectly, with just as much padding as it requires to keep it safe, but as little waste as possible.
Packing tape seals the box, and large boxes have straps applied for extra security. Finally, a Fragile sticker announces the special contents and encourages the delivery person to treat the parcel with care.
Depending on where the print is being shipped, it will take two to seven days to arrive. Considering the print can be ready to go within a day or two, that's a pretty quick turn around!
|
|
|
Creating a canvas print that our client will be proud to display in their home for decades to come is a complex process, but it is well worth the end result!
If you have any questions about our process, or any of our products or services, please don't hesitate to contact us. Our knowledgeable staff are always happy to help, with answers, suggestions or advice.
|
|
© 2002-2024 - KeenART Media Ltd.
|
|
| |
|