| PRINTING BLACK AND WHITE PHOTOGRAPHS |
 |
|
Anyone who has ever printed a black and white photo probably knows what it's like to be dissatisfied with the resulting print. Getting any image to appear in print just the way you envisioned it in your mind or on your computer screen is a complex task, and black and white specifically presents its own difficulties.
If your black and white prints are turning out the way you want, there are three primary culprits to consider, correct, and eliminate:
- Computer edits, including monitor calibration
- The printer and inks used to create the print
- The paper on which it is printed.
|
SUMMARY
| BEFORE PRINTING |
PRINTERS AND INKS |
PAPERS |
ENLARGING IMAGES |
| Before you begin editing your image, you will want to make sure your computer monitor is properly calibrated. When printing black and white photos, creating good tones, true black, and true white are especially important. |
Some printers are less capable than others are creating neutral grey. This can leave your prints with a colored cast. Always print test strips if you are not sure about the printer's capabilities. |
D-max, paper whiteness, and paper texture are three things to consider when selecting the best paper for your black and white prints. The white of the paper will be the whites in your image. |
If you plan to print your black and white images at very large sizes, you may need to re-evaluate your workflow during the editing process. We share tips from a pro photographer. |
|
| GETTING YOUR IMAGE READY TO PRINT
|
|
Before you begin fussing with printer, inks, and papers, you will want to edit your photograph so it looks the way you want your print to look. Then, instead of fiddling with physical settings trying to tweak the print, you need to focus only on making the print look like your on-screen image.
Monitor Calibration
There are countless online tutorials on calibrating your monitor to "real world" colors, so we won't go into that here. But suffice to say in order to edit your photographs and have the prints turn out anything like they appear on your screen, you'll definitely need to have your monitor calibrated to the best color (and grayscale!) match and, as a result, the best prints.
Adjusting the Image Tone
Getting the tone of your black and white photograph just right is a huge part of being satisfied with the final print. For simplicity, we'll assume you are looking for "true" black and white" and not seeking an artistic tint at this point.
One editor offering you'll want to take advantage of is the curves tool. Adjusting your image using this tool makes much more subtle, gradual changes than using Levels, or other sliding bar tools. With curves, you can adjust different colors/tones separately, creating an image that has both rich, deep blacks and stark, true whites.
This tutorial from How-To Geek is helpful and easy to follow.
Other Quick Tips
- Look at other black and white images, and watch black and white movies! See which pictures and which parts catch your eye and figure out why they do. Then play with your own images and try to imitate these contrasts and tones.
- Aim for a few sections to true black and a few sections of bright white in every image. Having both of these means you'll have a wider range of beautiful midtone grays scattered throughout the photo.
- You can expand the range of contrast your image is capable of simply by brightening the image a little. Remember, you want a true white somewhere.
- Flat light, or light that doesn't have a lot of variation - a mostly solid gray like a foggy morning - has serious creative potential. Don't assume just because your picture isn't a riot of deep blacks and bright whites it can't be printed in grayscale!
- You don't have color to make things pop, so you need to find other ways to draw focus. Try vanishing lines, and keep the rule of thirds in mind.
- If you want to experiment with something a little different, you can add colored tones to your images. Though they are no longer truly black and white, they could still be beautiful. Play with sepia, cool blues, and even unexpected tints like violet.
|
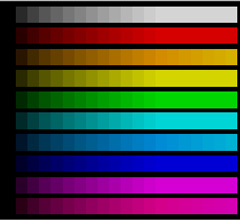
Color calibration
This image needs a pure black
|
| THE PRINTER AND THE INKS
|
|
DIGITAL PRINTERS
One difficulty in printing black and white photos is finding a printer that can create a really good, neutral gray. In a lot of cases, your black and white prints will have a bit of a color cast to them - a cool blue or a warm yellow. Often, these tints aren't noticeable unless you compare that print with one that can create a true, neutral gray.
If the printer is the problem, no amount of tweaking your image will fix the print, but once you've found a printer that can create those beautiful, true greys, you're set!
If you're printing photos yourself, you might want to look into special printer driver editor software. Sometimes the driver that comes standard with the printer isn't ideal for the type of prints you want to create.
Running Test Strips
When you're trying out a new printer, paper, or image, you may want to run some test prints before you print the full size image, especially if you are preparing for a large print.
When you print a test strip, always print the image at the size you plan to print the final piece. You don't want to waste paper, of course, but it is pointless to print a future 24x36" image as an 8x10" - you won't be able to judge the gradients, tones, details, or potential problems.
Instead, print just an 8x10" section of your 24x36" image. Choose an area with a lot of detail, or a section you were concerned about during editing. Look for stepped gradients (jerky rather than smooth transitions between tones), any color casts, proper resolution (only as much graininess or pixelation as you deem acceptable), and other issues that call for adjustments.
Another note on test strips: If you're testing different printers (either ones you own or visiting various print shops), use the same image! It's impossible to accurately compare quality and tone between two different photographs.
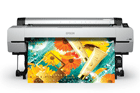
PRINTER INKS
Though any high quality inkjet printer and inkset is going to produce pretty decent black and white prints, there have been many advancements in black and white digital printing in recent years, resulting in inks designed specifically for printing greyscale.
At KeenART Media we use Epson UltraChrome K3 inks. These inks offer not only basic black for printing, but also two shades of grey: light black and light light black. As well, they offer two, interchangeable options of true black: matte for artwork reproduction and photo for, well, photos. These options are meant to "optimize the black ink density" in prints.
You can read more about the inks we use: Epson UltraChrome K3.
|
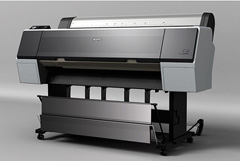
Epson 9890 printer
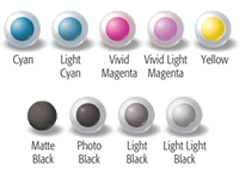
UltraChrome K3 inks
|
| THE PAPER YOU CHOOSE
|
|
D-Max
One of the important things to look for when choosing a paper for your black and white photographs is the D-max rating. This number (a decimal between about 1.40 and 2.50) basically indicates how "black" the black of your image will appear on that paper. Higher number=greater density of black the paper is capable of.
At KeenART Media, we offer a variety of photographic fine art papers. Our Enhanced Matte has a Dmax of 1.75, which is very good for a matte paper since there is no reflection to add a grey or white sheen to those blacks. Luster and glossy papers, on the other hand, have a Dmax as high as 2.35.
Paper Whiteness
We have an entire article on Paper Whiteness, but suffice to say here that whether your paper is white with a blueish tint or white with a yellowish tint, or closer to pure, bright white will make a difference in how white your whites and how black your blacks.
Printers do not have white ink, so any white on your print is just the paper, void of any ink. That means in order to get true whites in your print, you will want to select a "true white" paper.
If your whites appear really white then, by contrast, your blacks will appear richer.
Paper Texture
When considering a paper for your black and white print, also think about how important texture is to the image. Cold press, textured fine art papers feel wonderful - thick and soft - but chances are your paper print will be framed, so unless you like the visible aspects of the textured papers, a smooth paper makes just as much sense.
It's also important to note that textured papers are more likely to be less white than photographic and other smooth papers.
|

Black isn't always "black" on every paper
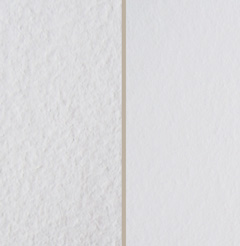
Textured and smooth digital papers
|
| PREPARING DIGITAL IMAGES FOR VERY LARGE PRINTS
|
|
|
This section is not exclusive to black and white, but does deserve a bit of attention. What do you do when 8x10" or 18x24" just doesn't cut it for the display you have in mind?
This Northlight Images article offers some useful, though certainly opinionated, insights into printing black and white images and, specifically, enlargements: Printing Black and White Digital Photos. The article also includes lots of links to other helpful pages.
The list below sums up some of photographer Keith Cooper's tips:
- Shoot your photos in RAW so you have the maximum editing ability.
- You will need to sharpen your images when enlarging, so use a dedicated sharpening program or a tool you trust. Consider using selective sharpening: choose to focus on places the eye is likely to look, areas where you'd like the impression of more sharpness, or parts of the image that would be sharp in reality (ie: trees, not clouds).
- When fussing over resolution, remember no one stands ten inches away to view a 12-foot wide image. The farther the viewer will stand to see your photo, the larger the pixels can viably be.
- Further to the point above, remember it is possible to print large images at a lower ppi (180 instead of 300, for instance). This alone can allow you to make your images larger than you may have originally planned. To learn more about ppi, see our article Pixel Resolution.
- Though resampling your photo (adding pixels digitally) is generally frowned upon and, indeed, we recommend against it in other articles, Keith suggests you don't discount the possibility. If you're considering this approach, see his article on Resampling for more information.
|
|
| FINE ART PAPERS AT KEENART MEDIA
|
|
|
We offer a varied selection of Fine Art Papers on which we can recreate any of your favorite black and white or full color photographs:
Fine Art Papers
- Hahnemuhle Photo Rag (light texture, Dmax: 1.64)
- Hahnemuhle German Etching (heavy texture, Dmax: 1.54)
- Hahnemuhle William Turner (heavy texture, Dmax: 1.58)
- Hahnemuhle FineArt Baryta (smooth, Dmax: "extremely high")
- Hahnemuhle FineArt Pearl (smooth, Dmax: 2.88)
- Epson Ultra Smooth Hot Press (smooth, Dmax: 1.56)
Epson Photographic Papers
- Premium Glossy (smooth, Dmax: "high")
- Premium Luster (light texture, max: "high")
- Premium Semi-Gloss (light texture, Dmax: "high")
- Premium Semimatte (Dmax: "high")
- Metallic (Dmax: "very high")
|
|
|
At KeenART Media, we will work with you to create the best, most beautiful black and white photographic prints you can imagine. Our experienced graphic designer can help you determine the best size, paper, and whether any adjustments are needed prior to printing.
We are happy to provide test strips for any image, and will always send you a digital proof before printing if we have made any changes.
If you have questions about any of our services or products, don't hesitate to contact us. Our knowledgeable staff are always there to assist with answers, advice, or suggestions.
|
|
© 2002-2024 - KeenART Media Ltd.
|
|
| |
|